Retool boasts an incredible set of tools to build a custom UI that connects seamlessly to your existing backend.
We can use the GraphQL API Grafbase provides to build a UI with Retool to manage data visually with low-code.
You must have an account with Retool and Grafbase to follow this guide.
We'll keep it simple by creating a single Post type that we can use in our Retool app.
You can create your own API locally using the CLI, connect to GitHub and deploy.
type Post @model {
  title: String!
  slug: String!
  content: String!
}
Begin by creating a new GraphQL Resource.
This isn't always necessary but it's good practice if you plan on managing multiple Grafbase projects. Here you can abstract environment variables such as the API URL and API Key:

You here will give it a name, provide the Base URL, and x-api-key Header:

The Base URL and Production API Key for your API can be found in your project overview.
You're now ready to use your Grafbase GraphQL resource from within any Retool app. You can also configure Retool to work with your preview environments when upgrading to a paid plan.
Once done click Save.
Next we will create a shared GraphQL query that we can use across applications.
From Query Library click + New and add the following query:
query GetAllPosts($first: Int) {
  postCollection(first: $first) {
    edges {
      node {
        id
        title
        slug
      }
    }
  }
}
Make sure to give it a name and select the name of your GraphQL Resource from the dropdown:

Here I have provided a value for the GraphQL variable first. You can derive this value from your UI but for the purposes of this guide, you will want to provide a value.
Once you're done make sure to click Share.
If we invoked the query above we'd receive nothing from our GraphQL backend. So we can add Posts to our collection we must create a shared mutation.
From Query Library click + New and add the following mutation:
mutation NewPost($title: String!, $slug: String!, $content: String!) {
  postCreate(input: { title: $title, slug: $slug, content: $content }) {
    post {
      id
      title
    }
  }
}

Retool automatically detects the GraphQL variables. Instead of providing static values for these we will declare Retool variables using the {{ }} syntax. This will expose these variables to be used in forms components.
Once you're done make sure to click Share. This makes it available to use inside of the application we'll create next.
Now create a new app from your Retool dashboard and give it a name such as "Grafbase Admin" to get started.

Using the right panel of Components inside Create you will want to add a new Form to your application UI:

We will add 3 Text Input fields to the form:

Once 3 fields have been added you will want to name the fields individually for better reference later. Make sure to name them:
titleslugcontent

You can also set these fields as required in the Validation settings when inspecting each element.
Once done your form should look a little something like this:

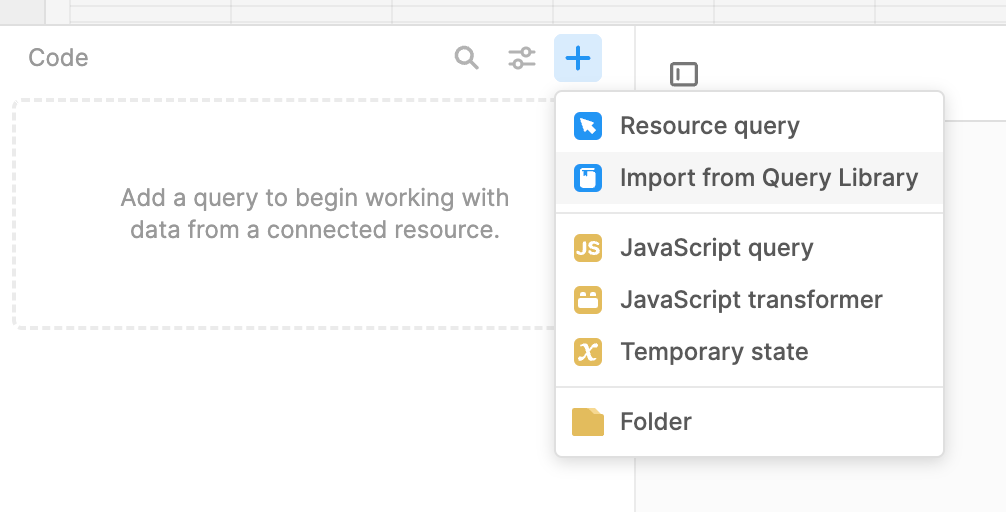
Now select Import from Query Library from the dropdown to add a new query:

Now select the query New Post that we created earlier and provide the variables. The variables use the name of the form we added followed by .data then the name of the field that you also named previously:

Make sure to set this to run query only when manually triggered. You can save and rename this query to be anything you like. I will rename this to create.
Next configure the mutation to be triggered when the form is submitted.
Inside the Interaction section of the form Inspect settings select the name of your query to run:

That's it for our form! When submitted the mutation should successfully add a new Post to your Grafbase backend.
Using the right panel of Components inside Create you add a new Table to your application UI:

Now select Import from Query Library from the dropdown to add a new query:

Here you will want to Select query and pick the name of the shared query you created previously:

Now click Save & Run. If everything worked you should see the query response below:

Now all that's left to do is connect the table to the query.
Click on the table and inside of the Inspect panel add to the Data field the following:
{{ query.data.postCollection.edges }}

If you gave a custom name to your query created above you will want to use that instead of query in the Data value above.
Next we will configure 3 columns to show in the table:
- ID
- Title
- Slug

Make sure to click + Add and name the columns accordingly.
You will also want to update the Display value for each of the fields using the following format:
{{currentRow.node.[fieldName]}}
Note: [fieldName] would be id, title, and slug respectively.
So that the table refresh when we data is submitted we can add a success handler to our form.
Select the form we added previously and inside of the Form Handlers section add a new success handler:

All that's left to do is submit a new form entry and you should see the table has been updated with the results, including the ID generated by Grafbase:

